IN GENERAL
Fast Track From Final Cut Pro to DVD SP
Quick Menu From Photoshop to DVD SP
MENUS
Using Motion to Create
Animated Backgrounds (FADE IN )
Using DVD SP Assets From Templates
Auto Assigning Buttons/
More Button Creation-Mapping
Semi/Pseudo Animated Rollovers Sort Of
TRACKS
STORIES
Scriptless Play All/Scene Selection
SCRIPTS
Using Scripts For Preferences (Audio Selection)
| DVDSTEPBYSTEP.COM / Layered Menus |
OVERVIEW
Layered Menus can provide some cool visual effects that standard Overlay Menus do not. Layered Menus do have some shortcomings and may not behave the same on all DVD Players/Computers. In general what happens is that a series of menus (sort of) is made by DVD SP and then when each button is "selected" certain menus are shown or hidden. These menus are generated by a layered Photoshop File, and you select which layers are shown or hidden for each button that you make. (Note that unlike Simple Overlay menus, the buttons do not need to be placed over a specific area). In this example, a Photoshop File is made that has a normal state of plain red text, a selected "glow" state and an activated state of a glow and an arrow popping up.
DETAILS
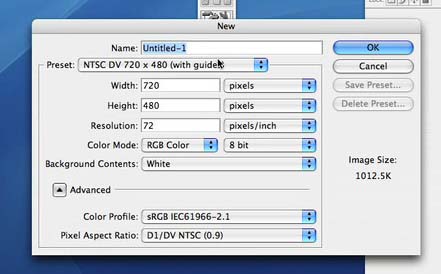
1.) Start a new Photoshop project (this is standrad NTSC template in Photoshop CS2
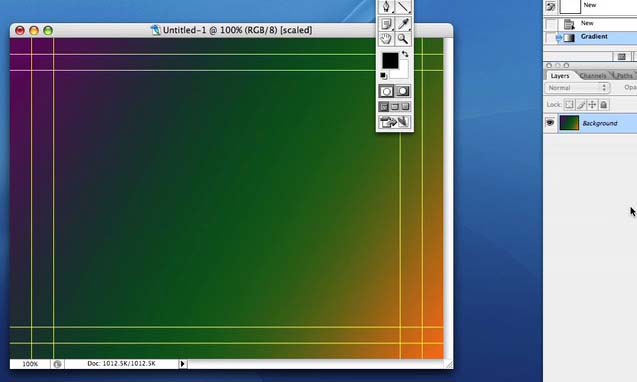
2.) On the base layer place the items you always want to see across all menus
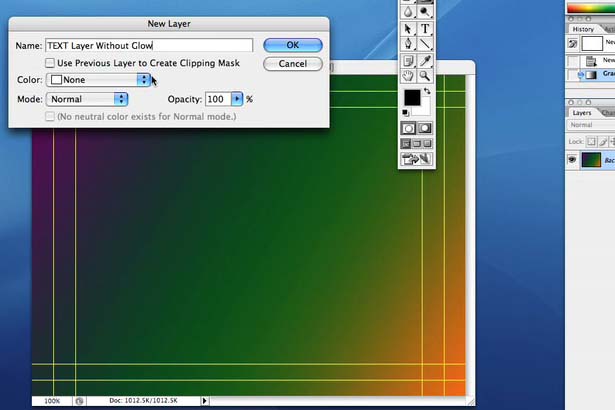
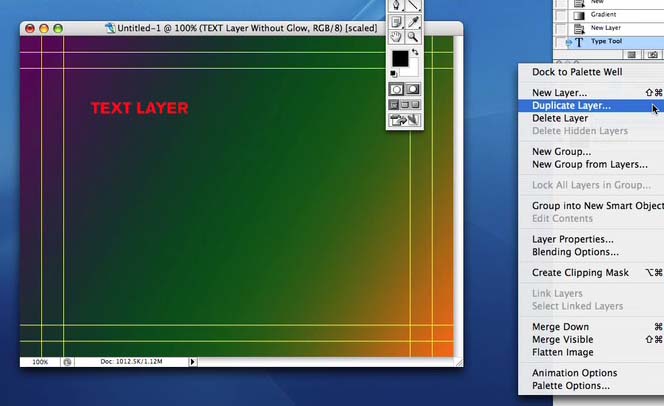
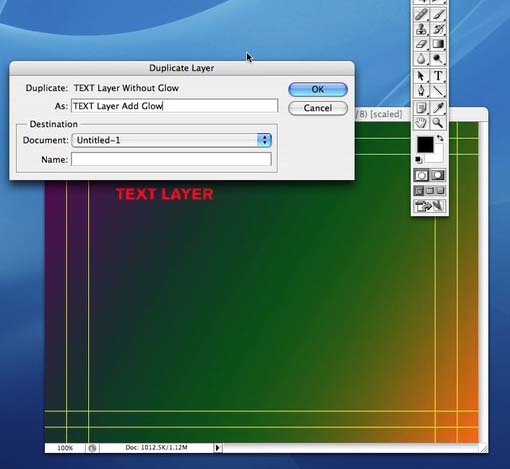
3.) A new layer, text without the glow, is made, this will be the "normal" state make the glow layer.

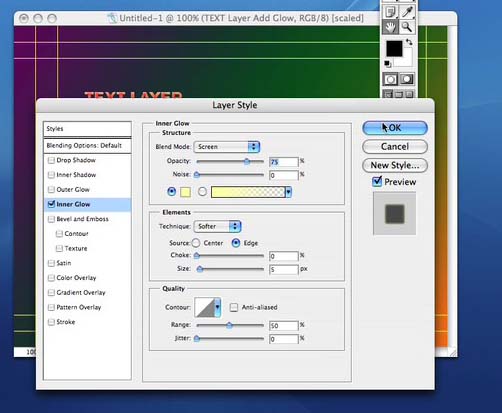
4.) I then duplicated the Text No glow layer and added a glow to the text to
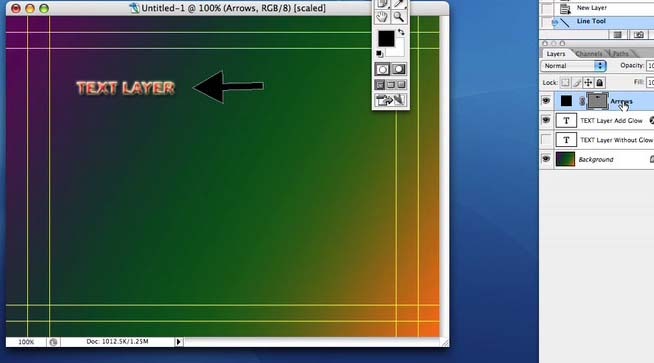
5.) And another layer with the arrow
6.) Note that it is important to rasterize all layers and effects - in the Photoshop Movie note when the layers are ratsterized, and then also note a Layer placed under the text layer with the effect and that the text layer is merged down. (Something not shown in the Photoshop Movie, a second group of the same layers are made for a second button in the DVD SP Project.)
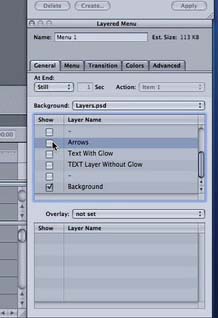
7.) Bring the Photoshop file into DVD SP and set background file for the menu using the inspector
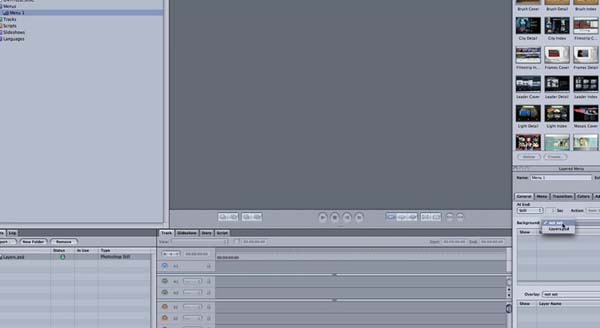
8.) After the image is set, scroll down in the box and deselect all layers except for the background layer
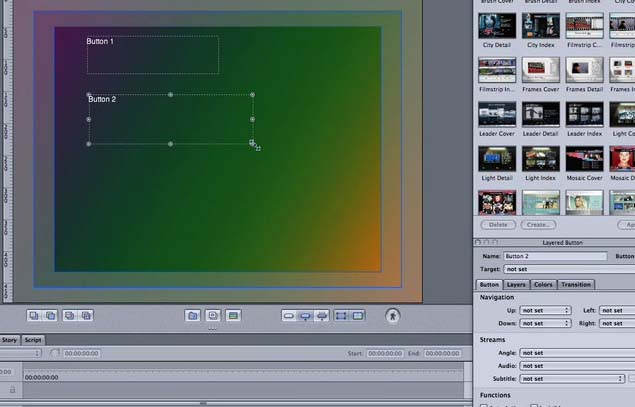
9.) Make a couple of buttons (anywhere you like in fact, though it is easier to try to keep some sense of order. Also NEVER overlap buttons (the dotted areas)
10.) And now where it is all tied together. Highlight button 1, then in the inspector you will see three columns, from left to right, normal, selected, activated. For this button (look at the check marks), Text Layer Without Glow is the normal state, Text With Glow is set as selected and BOTH Text With Glow and Arrows are selected for activated states
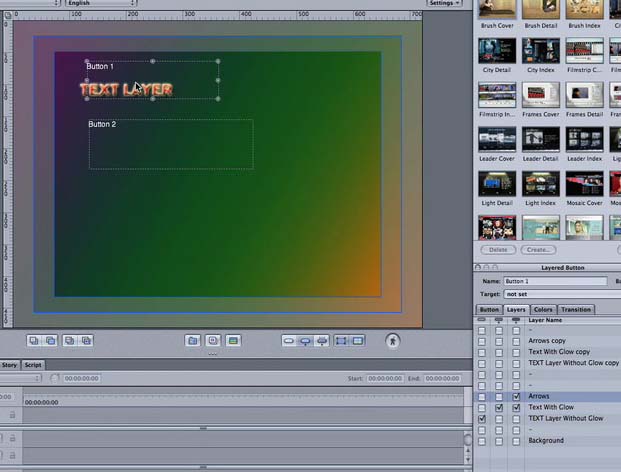
NOTE The layers and their positions HAVE NOTHING to do with where the buttons are placed. So you can put anything anywhere to show or hide. To get the "rollover" "pop-up" you would place the "pop-up" one on top of the other in different layers, so it looks like the image is changing in the same spot.
The movie to prepare the Photoshop File is here and the DVD SP movie using the layers is here The project, including the photoshop file, is here. (Control Click and download linked file)